
Introduction
Here’s the revised intro with transition words added for better flow:
Google Search Console (GSC) is not just an optional tool; rather, it’s a cornerstone for anyone serious about their website’s online presence. In fact, this platform provides a treasure trove of insights that are vital for optimizing your site’s performance. By adding your WordPress site to Google Search Console, you not only gain access to valuable data but also significantly enhance your understanding of how Google views your site. Therefore, this guide will walk you through the 11 essential steps to integrate your WordPress site with GSC, ensuring your site is primed for peak performance.
Step 1: Create a Google Account
Before diving into the specifics of Google Search Console, you need a Google account. If you don’t already have one, head over to Google’s sign-up page. It’s advisable to use a professional email address associated with your business or website. This not only looks professional but also helps in managing your digital assets in an organized manner.

Step 2: Access Google Search Console
Once you have your Google account ready, navigate to the Google Search Console homepage. The interface is user-friendly, but it can seem overwhelming at first glance. Take a moment to familiarize yourself with the dashboard and its various sections.
Step 3: Add a New Property
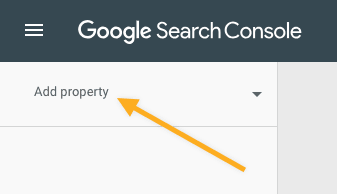
In GSC, your website is referred to as a “property.” To add your WordPress site, click on the “Add Property” button. This is the starting point where you tell Google that you have a new site that you want to monitor.
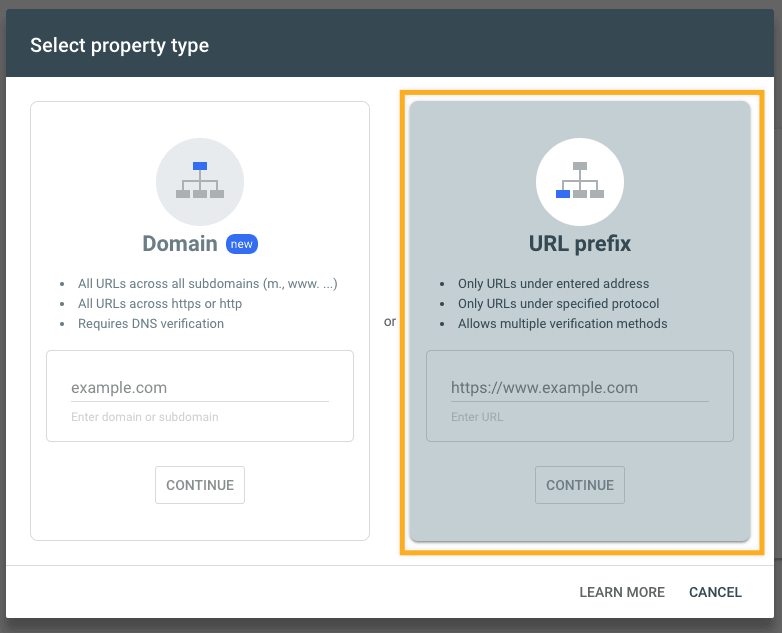
Step 4: Choose Property Type
You will be prompted to choose between a Domain property and a URL prefix property. The Domain property provides a comprehensive view across all subdomains and protocols, whereas the URL prefix property focuses on a specific URL and its subdirectories. For most WordPress users, the URL prefix property is sufficient and easier to manage.
Step 5: Verify Site Ownership
Verification is crucial as it confirms that you own the site or have permission to manage it. Google offers several verification methods to ensure flexibility. This step is necessary to unlock all the features and data that GSC offers.
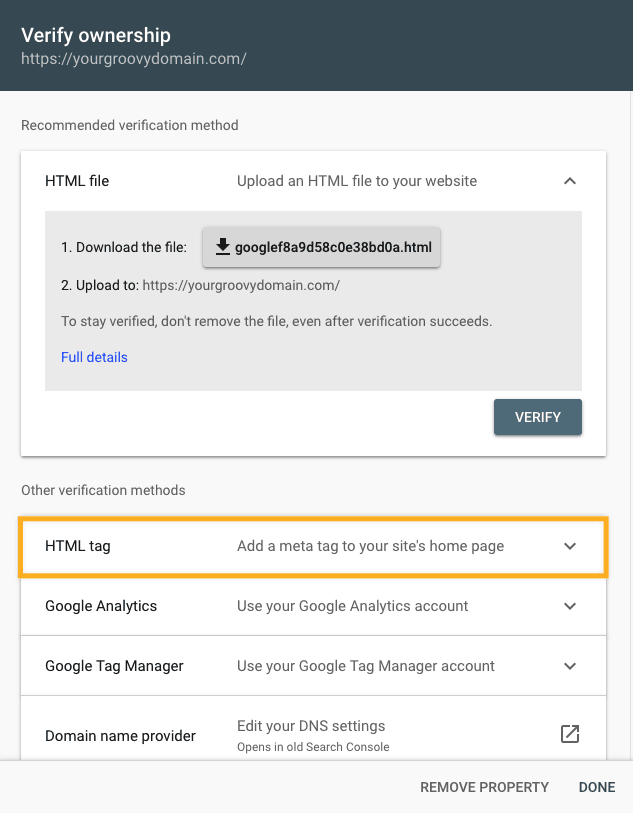
Step 6: Using HTML Tag Verification
One of the simplest methods to verify your site is through an HTML tag. GSC provides a meta tag which you need to add to the head section of your WordPress site. This can be done easily using a plugin like Yoast SEO, which allows you to insert code in the header.
Step 7: Using Google Analytics for Verification
If you already use Google Analytics, you can leverage it for GSC verification. This method involves linking your Google Analytics account with GSC, providing a seamless way to verify your site without additional steps.
Read more about How To add Google Analytics to WordPress Website : GA4
Step 8: Using Domain Name Provider Verification
Verification via your domain name provider involves adding a TXT record to your DNS settings. This method might be slightly technical, but it’s very reliable. Common issues include propagation delays, which can be resolved by rechecking the settings after some time.
Step 9: Submit a Sitemap
A sitemap is essentially a roadmap of your site’s pages that helps Google understand its structure. Plugins like Yoast SEO can generate a sitemap for you. Once you have your sitemap URL, submit it in the GSC to enhance your site’s indexing.
Step 10: Check Index Coverage
The index coverage report in GSC shows which pages are indexed and highlights any issues. Regularly checking this report ensures that all your important pages are visible to Google and helps you quickly address any errors.
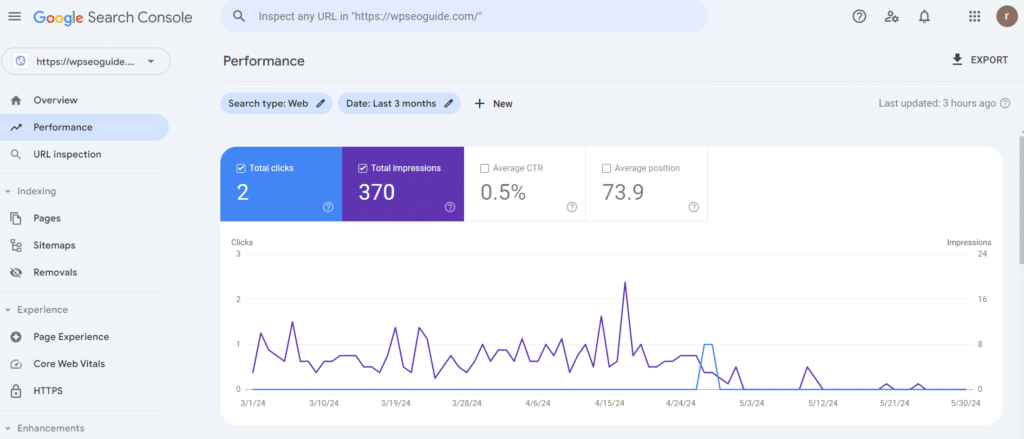
Step 11: Monitor and Analyze Performance
After setting up GSC, the real work begins. Use the performance reports to monitor your site’s traffic, understand which queries bring visitors, and identify areas for improvement. Consistent monitoring and optimization are key to maintaining a healthy online presence.
Conclusion
Adding your WordPress site to Google Search Console is an essential task for any webmaster. The steps outlined above provide a comprehensive guide to getting started and leveraging the power of GSC to enhance your site’s performance. By following these steps, you ensure that your site is well-indexed, error-free, and optimized for search engines. Stay proactive with GSC, and your efforts will translate into better visibility and higher traffic for your WordPress site.


[…] Google Search Console is a treasure trove of information about how people find your site. By looking at the Search Analytics report, you can see the actual queries people are using to reach your content. This can give you insights into what long-tail keywords are already bringing traffic to your site and which ones you might want to target more . Discover how to add your wordpress site to the google search console […]
[…] Up Google Analytics and Google Search Console are essential tools for tracking your blog’s performance. They provide insights into your […]